
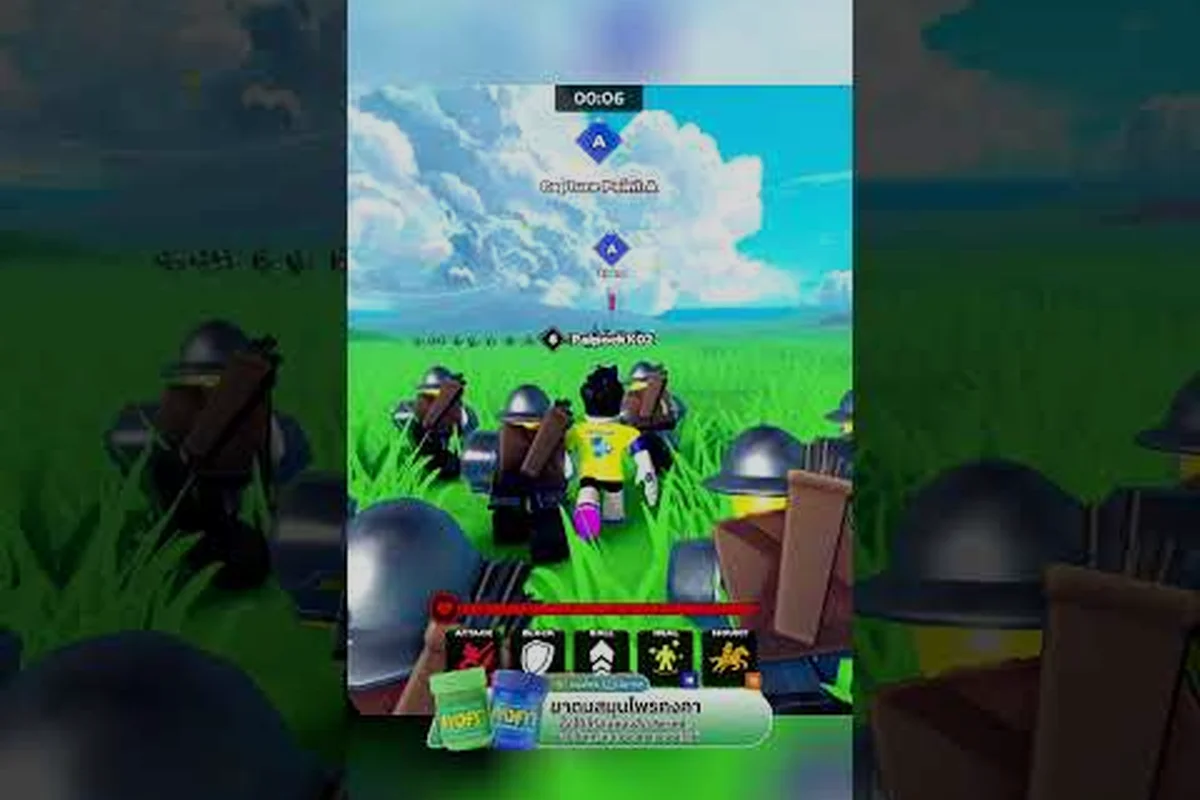
Defending in Command An Army looks deceptively simple, but holding a capture point while an enemy wave closes in is a layered test of formation timing, troop selection, and lane discipline. Many players jump into the defend side, place their troops at the flag, and wonder why the line collapses in under a minute. The defending team's win rate is built on small decisions made in the first 20 seconds of a round, and getting those decisions right is what separates a held point from a steamrolled loss. This guide breaks down exactly how to lock down a point, from your opening formation to the final stretch when the enemy throws everything at your line.
Understanding The Defend Side In Team Battle Mode
Command An Army is a Roblox strategy battlegrounds game where two squads of AI troops clash in team-vs-team warfare, and the defender's job is to stop the attackers from capturing a fixed point on the map. According to the official Command An Army page, the mode asks a single question each round: "Will you break their line or hold yours?" The defending side answers that question with positioning, unit composition, and reaction speed, not raw troop count.
Core Objective And Win Condition
The defend team's only goal is to prevent the capture bar from filling. There is no bonus for kills, no side objective to capture, and no way to win by elimination alone once the attackers reach the point. That single focus is what makes defense feel different from attack: every troop you place needs to slow, disrupt, or delay the enemy push, not chase kills down the lane.
Why Defend Feels Harder Than Attack
Attackers can reposition freely, rotate flanks, and reset pushes after a failed attempt. Defenders are anchored to a small zone around the point, which means a single bad call cascades into a lost round. Player-reported win rates on the defend side hover around 45-48% in casual lobbies, while attack leans slightly higher at 52-55%, which is why understanding your role before queuing matters. The Command An Army game modes overview shows that team battle splits evenly between attack and defend each match, so you will be defending as often as you are pushing.
Defender Mindset Versus Attacker Mindset
Attackers think in momentum: build a frontline, push forward, capture ground. Defenders think in layers: first line absorbs, second line delays, third line contests the point. The shift in mindset is subtle but important, because copying attacker habits on defense is the most common reason new defenders lose their line in the first 30 seconds.
Reading The Four Formation Commands For Defense
The four formation commands, Follow, Hold, Attack, and Rush, behave very differently on the defend side, and picking the wrong one at the wrong time is the fastest way to lose a point. All Things How's breakdown of Star Limits and Classes confirms that formations are the primary way to direct AI troop behavior during a round. On defense, only two of those commands carry real weight in most rounds.
Follow Vs Hold On Defense
Follow keeps troops glued to your character, which sounds safe but actually weakens your defense because troops bunch up at the flag and become a single-target blob for enemy AoE. Hold anchors troops to the ground where you place them, which is what you want for a static defense line. The single most common defending mistake is leaving Follow on by default and wondering why the line folds the moment a Cavalry unit hits it.
Attack And Rush As Counter-Push Tools
Attack sends troops at the nearest enemy, and Rush does the same with an aggressive dash. Neither is ideal for a passive defense, but both have niche uses: if the enemy wave has stalled just outside your point, a timed Attack command can collapse their frontline before they regroup. Rush is almost never correct on defense because it pulls troops out of position and leaves the capture point exposed.
Defense Formation Decision Table
| Situation | Recommended Formation | Why It Works |
|---|---|---|
| Enemy wave 20+ studs out | Hold at choke line | Troops anchor, fire from cover, block path to point |
| Enemy stalled at mid | Attack on marked target | Collapses stalled frontline, buys 5-8 seconds of breathing room |
| Enemy on the point | Hold at point perimeter | Prevents further advance, contests the capture bar directly |
| Enemy retreating | Follow at choke | Stops troops chasing into open lane, keeps formation intact |
| Late-round desperation | Hold at point + Attack on heavy units | Layers defense, breaks the largest enemy threat first |
The takeaway is that Hold is your default for roughly 70% of a defense round, and the other three commands fill specific windows where the enemy behavior changes. Players who treat defense as "always Hold" miss counter-push opportunities, and players who spam Attack lose their line within seconds.
Building The Right Defender Troop Composition
Troop composition matters more on defense than attack because you cannot reposition to cover a bad matchup. Attackers can rotate to avoid a hard counter, but defenders absorb whatever the enemy brings, so your lineup needs to cover all four classes: Melee, Ranged, Cavalry, and Special. The Command An Army attacking guide covers how attackers build their line, and the same class system applies on defense.
Class Roles For Defenders
| Class | Defensive Role | Best Placement |
|---|---|---|
| Melee | Frontline anchor, absorbs hits | At choke, 10-15 studs in front of point |
| Ranged | Sustained damage from cover | Behind Melee line, on slight elevation if available |
| Cavalry | Flank disruption, hit-and-run | Side of point, not on the main lane |
| Special | Burst damage, anti-cavalry | Behind Ranged, targets enemy Cavalry and Special first |
A common defender mistake is stacking three or four Ranged troops because "ranged does more damage." In practice, a Ranged-only defense collapses the moment enemy Cavalry reaches your backline, because there is no Melee unit to hold them. The Command An Army attacker role guide explains that attackers exploit this exact weakness by sending one Cavalry unit behind a Melee push.
Recommended Defend Lineup
For most rounds, a balanced 3-2-2-1 split works best on defense: 3 Melee, 2 Ranged, 2 Cavalry, 1 Special. The Melee anchors the choke, Ranged picks off targets from behind, Cavalry rotates to intercept enemy flanks, and the single Special unit deletes high-value targets. This spread gives you answer coverage for every attacker composition without leaving a fatal gap.
Adjusting For Enemy Composition
If the enemy brings heavy Cavalry, swap one Ranged for a second Special so you have burst to delete the Cavalry before it reaches your backline. If the enemy goes Ranged-heavy, add a second Melee unit at the choke so your frontline pushes through their damage and contests the point in their face. These swaps are small but they change round outcomes more than any micro-adjustment during the fight.
Positioning, Choke Control, And Lane Discipline
Where you place your troops in the first 10 seconds of a round decides roughly 60% of your defensive outcome. Most defenders default to placing troops directly on the capture point, which is the second most common reason defenses collapse: you lose the choke, the enemy walks straight onto the point, and your troops are caught in a no-mans-land with no front to anchor against.
Why The Choke Matters More Than The Point
The choke is the narrow lane between the enemy spawn and your capture point, and controlling it forces the attacker to fight on your terms. A defense that holds the choke only has to kill troops walking through a narrow corridor, which multiplies your effective DPS. A defense that abandons the choke to hug the point has to fight in a wide arc against troops arriving from multiple angles.
Defensive Positioning By Map Section
| Map Section | Defender Placement | Key Reason |
|---|---|---|
| Main choke lane | 2 Melee + 1 Ranged | Anchors frontline, blocks primary advance route |
| Side flank | 1 Cavalry + 1 Ranged | Watches for enemy Cavalry rotation, contests side route |
| Capture point perimeter | 1 Melee + 1 Special | Last line, contests capture bar when choke falls |
| Backline reserve | 1 Ranged, behind point | Cleans up units that slip past the choke |
This layered setup is what experienced defenders describe as a "two-line defense": the choke line delays, the point line contests. The Command An Army best game mode breakdown recommends similar layering for team roles in modes with mixed objectives.
When To Abandon The Choke
If the enemy brings a sustained Ranged push and your frontline Melee are melting in 5-6 seconds, pull back to the point perimeter. Holding a choke that you cannot survive in just feeds kills and accelerates the capture. The decision point is simple: if your frontline is dying before the enemy reaches mid-lane, retreat is correct, even if it feels like giving up ground.
Reaction Windows: Reading The Enemy Push In Real Time
A defense round is not one continuous fight, it is a series of small reactions to changing enemy behavior. Experienced defenders describe a defense round as four overlapping windows: opening setup, first contact, mid-round stall, and final stand. Each window has its own priority, and mixing them up is how rounds slip away.
Opening Window (0-20 Seconds)
The opening is setup only. Place troops at the choke, hold formation, do not commit to Attack or Rush. Your job is to be in position before the first enemy unit reaches your sightline. Defenders who spend the opening chasing enemy spawn or repositioning Cavalry waste the only phase where placement is free.
First Contact Window (20-45 Seconds)
First contact is where you confirm whether your composition can hold the push. Watch the enemy frontline, identify the heaviest unit, and decide if your current line can absorb it. If yes, stay on Hold. If no, this is the window to issue a single Attack command on the heaviest enemy unit to break their push momentum before it reaches your choke.
Mid-Round Stall Window (45-75 Seconds)
A stall happens when the enemy wave is alive but not advancing, usually because both frontlines are trading and neither is winning. This is the window to swap one Ranged for Special if you have not already, and to issue Attack commands on enemy Cavalry that are flanking. The stall window is where defense rounds are actually won, because the team that breaks the stall first usually wins the round.
Final Stand Window (75 Seconds To End)
The final stand is when the capture bar is filling and every troop matters. Pull your reserve Ranged onto the point, set everyone to Hold at the point perimeter, and stop issuing Attack commands. The goal is no longer to kill, it is to delay. A defender who survives 5 extra seconds at the point can flip a round that looked lost.
Common Defending Mistakes And How To Fix Them
Even experienced Command An Army players fall into the same defensive traps, and most of them come from treating defense like a slower version of attack. The table below maps the most common mistakes to the specific fix that turns them around.
| Mistake | What Happens | Fix |
|---|---|---|
| Leaving Follow on default | Troops bunch at flag, die in AoE | Switch to Hold at choke before first contact |
| Stacking 4+ Ranged troops | Cavalry runs through backline uncontested | Cap Ranged at 2, fill rest with Melee/Special |
| Placing all troops on the point | Choke falls, enemy advances for free | Keep choke line separate from point line |
| Chasing kills with Attack | Line breaks, capture bar fills | Use Attack only on stalled waves, never mid-push |
| Ignoring side flank | Enemy Cavalry rotates, kills your Ranged | Station 1 Cavalry + 1 Ranged on side lane |
| Not reacting to heavy units | One enemy Special deletes your backline | Mark heavy units, swap to Special counter |
| Giving up after choke falls | Round ends in 20 more seconds | Pull to point perimeter, contest capture bar |
The pattern across all of these is the same: defenders who treat the round as a single decision lose, defenders who treat it as four overlapping windows win. The Command An Army how to win guide reinforces this same layered decision-making for general round strategy.
Attack Vs Defend: When To Pick Which Side
Every Command An Army team battle round gives players the option to queue as attackers or defenders, and the side you pick changes your optimal playstyle. The honest answer to "which side is better" is that neither side wins more than the other in skilled lobbies, but the path to winning looks very different on each side.
Attacker Advantages
Attackers control the pace, choose when to engage, and can reset after a failed push without losing ground. In casual play, attack has a slight edge because most new defenders do not know how to layer their lines, so attackers can brute-force a capture with a single heavy push. If you queue as attack and the enemy defense looks unlayered, commit early and hard, because hesitation lets them reposition.
Defender Advantages
Defenders fight on smaller, more predictable terrain, which means a single good choke setup can shut down repeated attacker pushes. Once you understand layered defense, you can hold points against attackers who outnumber you, because the geometry of the choke multiplies your effective strength. Skilled defenders report a personal win rate above 55% on the defend side, mostly because most attackers do not adjust their push based on the defender's setup.
Side Selection Decision Table
| Situation | Recommended Side | Reason |
|---|---|---|
| New to the mode | Defender | Smaller terrain, fewer decisions per round |
| Running heavy Cavalry comp | Attacker | Cavalry excels at rotating into undefended flanks |
| Running Ranged-heavy comp | Defender | Ranged wins from chokes, loses in open-field chases |
| Team of 2 or fewer | Defender | Less coordination needed, choke multiplies strength |
| Team of 3+ in voice | Attacker | Coordinated pushes bypass choke setups |
| Enemy defense is unlayered | Attacker | Single hard push breaks unlayered lines |
| Enemy attack is uncoordinated | Defender | Hold the choke, wait for them to overextend |
The "which side is better" question really comes down to your team comp, your experience with the mode, and how the enemy is playing. Switching sides mid-session to counter the enemy team composition is a strategy that experienced players use regularly, and the Command An Army best game mode guide explains how team roles shift between modes.
Frequently Asked Questions
What is the best formation command for defending in Command An Army?
Hold is the best default for roughly 70% of a defense round because it keeps troops anchored to their placed positions, which lets your Melee frontline absorb hits while your Ranged units fire from cover. Use Attack only when the enemy wave stalls just outside your choke, because a single timed Attack on the heaviest enemy unit can collapse their push and buy 5-8 seconds of breathing room. Avoid Follow on defense because it bunches troops at the flag and makes them a single-target blob for enemy AoE damage.
How do I counter enemy Cavalry as a defender?
The fastest counter is a single Special unit placed behind your Ranged line, because Special burst damage deletes Cavalry before it reaches your backline. Station one Cavalry unit on the side flank to intercept enemy Cavalry rotations, since a defender Cavalry unit can engage and delay an enemy Cavalry charge while your backline repositions. If you do not have a Special unit, swap one of your Ranged troops for a second Melee unit at the choke so your frontline stalls the Cavalry charge in place.
Is attack or defend easier in Command An Army team battle?
Attack is slightly easier for new players because the side controls the pace and can reset after a failed push, while defend requires stronger positional setup in the first 20 seconds. In casual lobbies, attack win rates hover around 52-55% versus 45-48% for defense, mostly because most new defenders do not layer their lines. Once you understand choke control and troop layering, defend becomes the higher-win-rate side because the terrain multiplies your effective strength.
Should I place troops on the capture point or at the choke?
Place the majority of your troops at the choke, not on the capture point, because controlling the choke forces the enemy to fight through a narrow corridor that multiplies your effective DPS. Keep only 1 Melee and 1 Special unit at the point perimeter as a last line that contests the capture bar if the choke falls. Defenders who place all troops on the point usually lose the choke within 30 seconds, then lose the point within the next 20.
What is the best defend lineup for solo play?
For solo defense, a 3-2-2-1 split works best: 3 Melee at the choke, 2 Ranged behind them, 2 Cavalry on the side flank, and 1 Special behind the Ranged line. This spread gives you answer coverage for every attacker composition without leaving a fatal gap, and it works even when you are the only active player on the defend side. Adjust the split if the enemy composition is obvious: add a second Special if they bring heavy Cavalry, or add a second Melee if they go Ranged-heavy.