
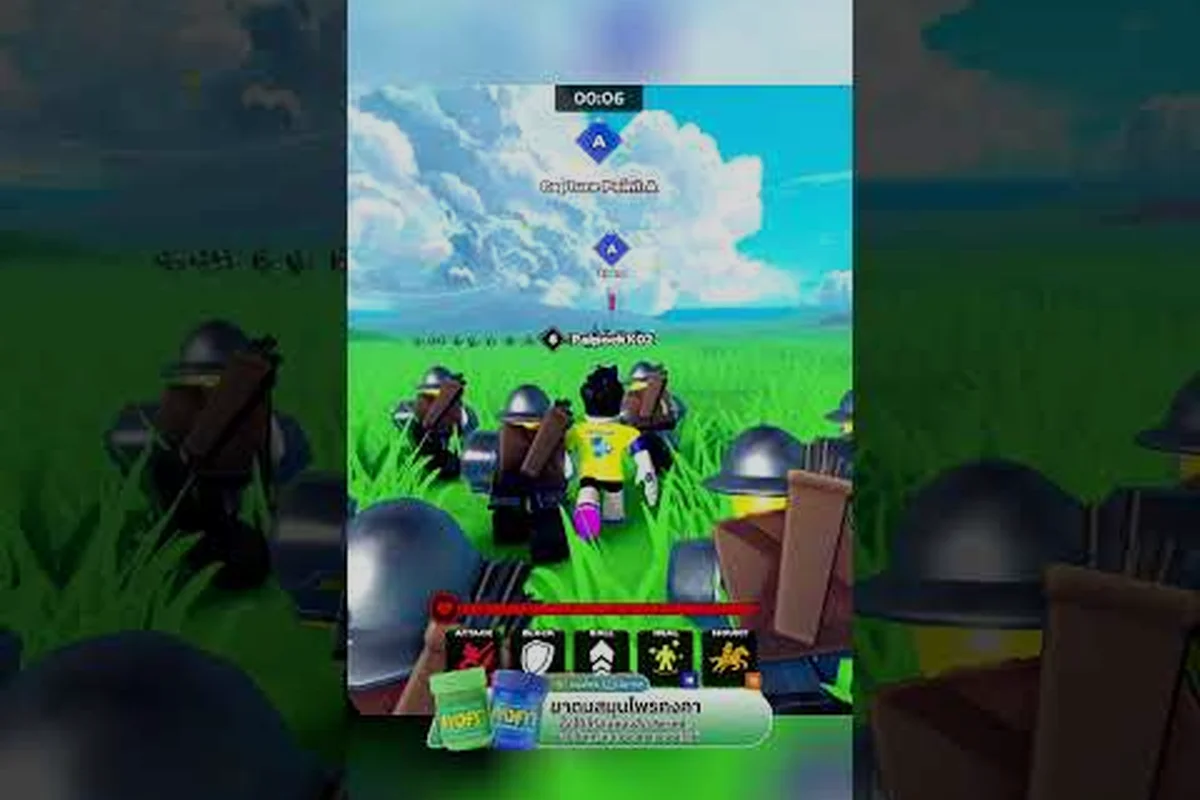
Reading the Battlefield Before You Press a Single Command
In Command An Army, the squad does not fight for you, it fights for the last player who gave a clear order at the right second. According to the official Command An Army page on Roblox, the game is built around team-vs-team warfare where you recruit AI troops, capture points, and decide whether to break the enemy line or hold yours. That means every match is really a conversation between four command slots, a map timer, and the patience to wait half a second longer than your opponent wants you to.
The core challenge of learning to command an army how to order troops is not the button layout. The four formation commands — Follow, Hold, Attack, and Rush — are easy to press. The challenge is timing them so your unit positioning matches the map, the spawn wave, and the counter-push window. Get the rhythm wrong and your frontline evaporates in four seconds. Get it right and a 1-star recruit squad can stall a fully upgraded push long enough for reinforcements to arrive.
This tactics guide breaks down formation timing, kiting angles, and the battle tactics experienced players use to keep squads alive in chaotic close fights. You will see how each command slot behaves, why troop positioning shifts the win rate more than raw star count, and how to chain commands during the most common scenarios in the current meta.
The Four Formation Commands And When Each One Wins
Every order you give in Command An Army routes through one of four formation commands. A community breakdown from All Things How lists the exact four: Follow, Hold, Attack, and Rush. What the breakdown does not always say is that each command is a positioning tool first and a damage tool second. Treat them like formation slots, not attack buttons, and your command an army formation strategy will look very different from players who spam Rush on cooldown.
What Each Command Changes About Your Squad
The four commands change where your units stand, not just what they target. Follow locks your troops to your player model, so wherever you walk, they walk. Hold parks your squad on the current tile and forces them to defend that spot until you give a new order. Attack sends them at the nearest enemy unit but lets them break formation to chase. Rush is the aggressive variant, telling your line to sprint through the path and only stop on contact with an enemy.
| Command | Stance | Best Moment To Use | Risk If Misused |
|---|---|---|---|
| Follow | Mobile, reacts to your movement | Capturing a flag, repositioning between lanes, early game before contact | Drags your frontline into bad chokepoints if you walk through a melee wall |
| Hold | Static, defends current tile | Holding a captured point, baiting an overpush, last-second base defense | Lets enemies surround you if you hold on an open field with no cover |
| Attack | Engages nearest enemy, chases kills | Mid-fight cleanup, picking off low-HP stragglers, breaking a stalled frontline | Breaks formation, which ruins kiting setups if you tap it during a retreat |
| Rush | Sprint commit, fights on collision | Opening engagement, finishing a losing fight before reinforcements can flip it | Blows stamina, leaves no fallback, and is the most punishable command if it whiffs |
The real skill is sequencing them. A clean Hold → Attack → Follow cycle is the backbone of most winning pushes. You anchor the squad, let the enemy commit into your line, then peel off with Follow once your melee units have soaked enough damage that the enemy frontline is exposed.
Reading The Map Timer Before You Issue Commands
The single biggest upgrade for a new commander is realizing that every order should answer a timer question. The map clock decides when points unlock, when reinforcements arrive, and when a losing team gets a final burst of resources. If you press Rush while the enemy is still spawning, your troops run into a fresh wave and lose the trade. If you press Hold during the final 10 seconds of a point, you waste the only moment your squad is strong enough to contest.
Before issuing any command, ask three quick questions:
-
Is the point about to tick, or is it still neutral?
-
Did the enemy just spawn, or are they running on fumes?
-
Is my frontline at full HP, or are they at 40% and about to collapse?
A simple rule that consistently wins games: never Rush into a freshly spawned enemy frontline, and never Hold on an exposed tile when the enemy still has cavalry. Your command an army formation tips work best when the map clock agrees with them.
Troop Positioning, Kiting Angles, And Why Standing Still Is A Loss
Command an army troop positioning is the layer most new commanders skip. They pick a class, press Rush, and hope the squad's raw stats carry the fight. The classes defined on the official page — Melee, Ranged, Cavalry, and Special — each want a different spot on the map, and placing them wrong is the fastest way to lose a winnable fight. The four formation commands only matter once your units are standing in the right tile relative to the enemy frontline.
Melee, Ranged, Cavalry, And Special Stance Spots
Melee units want to be on the closest tile to the enemy, but not in the densest cluster. Spreading them across a 2–3 tile line lets them surround a single target instead of all swinging at the same soldier, which is one of the cleanest ways to win a 1v1 trade. Ranged units want to stand one tile behind your melee line, far enough that enemy cavalry cannot charge them, close enough that their projectiles still land. Cavalry wants a flank tile, ideally the side opposite to where your ranged units are firing, so a charge pulls the enemy frontline out of position. Special units — typically the high-damage or healing classes listed in the troop guide — want the safest tile on the field, usually behind your ranged line and slightly off-center.
| Class | Ideal Tile | Common Mistake | Counter If Mispositioned |
|---|---|---|---|
| Melee | 2–3 tile spread on the front line | All stacking on one tile | Surrounded and killed before they swing twice |
| Ranged | One tile behind melee, offset slightly | Standing on the front line | Charged by cavalry before they fire a second shot |
| Cavalry | Flank tile, opposite your ranged line | Pushing down the middle | Swallowed by the enemy frontline, charge wasted |
| Special | Safest back tile, behind your ranged | Walking into the center of the fight | Killed in 2 seconds, ability never lands |
Kiting Angles That Keep Your Squad Alive
Kiting in Command An Army is not about running forever. It is about using Follow and Hold to drag the enemy frontline across the map while your ranged units fire into their backs. The clean kite angle is roughly 30 to 45 degrees off the direct path between your spawn and the capture point, never straight back toward your own spawn. A straight kite lets the enemy cut the corner and re-engage, which is the most common way kiting attempts collapse.
A three-step kite cycle that works on most maps:
-
Hold the squad on a tile one step ahead of the current frontline to bait the enemy into committing.
-
The moment their melee crosses your tile, tap Follow and walk diagonally toward your ranged line, not directly away from the enemy.
-
Hold again on the new tile once your ranged units have a clear line of fire, and let the enemy chase into a fresh volley.
This cycle gives you the command an army battle tactics most experienced players use without ever naming it: bait, peel, anchor. It is also the safest way to fight if you are running a lower-star squad, because each kite step wastes 2 to 3 seconds of enemy chase time, which adds up across a full match.
Squad Composition, Star Pressure, And When To Counter-Push
The classes and star limits covered in the Command An Army star limits and classes guide decide the ceiling of your squad, but the command an army formation strategy you build around those troops decides the floor. A balanced composition — usually 2 melee, 2 ranged, 1 cavalry, 1 special — gives you the positional flexibility to kite, hold, and counter-push without any single class carrying the whole match. Running three melee and a special will win some trades but leaves you with no kite path the moment the enemy frontline collapses.
Composition Templates For Common Match States
| Match State | Recommended Line | Reasoning |
|---|---|---|
| Early game, neutral point | 2 melee, 2 ranged, 1 cavalry, 1 special | Balanced spread lets you contest the first capture without overcommitting |
| Mid game, you hold a point | 3 melee, 2 ranged, 1 special | Extra melee locks the point; ranged cleans dives before they reach the backline |
| Mid game, enemy holds a point | 2 melee, 2 ranged, 2 cavalry | Double cavalry is your fastest counter-push tool; one flanks, one soaks |
| Late game, last 30 seconds | 3 melee, 1 ranged, 2 cavalry | All-in race to the point; ranged is the first class you can afford to drop |
| Losing, low squad HP | 1 melee, 3 ranged, 1 cavalry, 1 special | Pure kite composition; you cannot win a frontline trade, so you kite until the timer ends |
Counter-Push Windows And The Hold-Attack-Follow Chain
The cleanest counter-push in Command An Army starts the moment the enemy frontline collapses onto your ranged line. That is the only window where their formation is broken and your cavalry can charge from a flank tile without eating a full volley. The chain has three beats:
-
Hold your melee on the tile the enemy just overextended past, so they cannot retreat without taking free damage.
-
Tap Attack on the nearest ranged or special target the moment the enemy melee turns around to peel.
-
Once the enemy frontline is locked in place, Follow your squad as a single block, with cavalry charging from the off-angle tile you prepared two seconds earlier.
The reason this chain wins is that it abuses the command an army unit positioning rules: your melee stays anchored, your ranged cleans up, and your cavalry commits only after the enemy has lost their kite path. Trying to skip straight to the cavalry charge is the most common reason counter-pushes fail, because the enemy still has a clean Hold tile and your charge soaks a full volley before it lands.
Adapting Formations To Map Pressure, Spawn Waves, And Mid-Fight Chaos
Once the basics of command an army how to order troops are second nature, the next layer is reacting to mid-fight chaos. Spawn waves are not evenly spaced, and most matches have one or two moments where the enemy suddenly appears on your flank because you forgot to anchor a tile. A formation strategy that only works in a clean 1v1 lane will fall apart the first time a cavalry charge comes through a side corridor you did not watch.
Reading Spawn Pressure And Adjusting Stance
Spawn pressure is the easiest signal to read and the easiest to ignore. Every time a fresh enemy wave enters the map, the frontline shifts forward by roughly one tile and your ranged line loses a second of clear sight. The right command during a fresh enemy spawn is almost always Hold, because your squad has the positional advantage and a Rush here simply feeds into their fresh HP pool. The right command during a thinning enemy spawn, usually 3 to 4 seconds before the next wave, is Attack or Rush, because their frontline is at its weakest right before reinforcements arrive.
A simple way to track this in your head: count enemy melee units. If you see 4 or more on the frontline, Hold. If you see 2 or fewer, you have a spawn pressure window and you should Attack to secure kills before the next wave fills the gap.
Mid-Fight Fixes When Your Formation Breaks
Even the cleanest formation breaks. Cavalry gets baited into a bad charge, your ranged line walks one tile too far, the special gets caught by a flank. The fix is rarely a new full formation command. It is usually a single tile Hold to re-anchor the squad, followed by a 1-second pause to let the units recover their stance. A panic Rush is what turns a recoverable mistake into a lost fight.
| Situation | Quick Fix Command | Why It Works |
|---|---|---|
| Cavalry overcharged into the enemy frontline | Follow your player model to walk them out of the cluster | Re-paths the cavalry through a safer tile, gives them space to retreat |
| Ranged line walked too far forward | Hold on the current tile | Prevents further walk-up, lets melee catch up and re-screen them |
| Special got flanked by an enemy melee | Attack on the flank target | Pulls the closest melee unit off the special and into a 1v1 your squad can win |
| Whole squad clustered on one tile | Follow toward an open diagonal tile | Spreads the formation back out, restores kite angles and surround damage |
These small mid-fight corrections are the difference between a commander who can win a clean fight and a commander who can win a chaotic one. The command an army tactics guide style of play is really a stack of these small reactions, layered on top of the four core commands.
Closing The Match: How To Convert A Formation Lead Into A Win
The final layer of command an army how to order troops is closing. Most lost matches are not lost in the first 60 seconds, they are lost in the last 30, when a winning team overpursues and lets the enemy counter-push the undefended point. A disciplined closing sequence is the cleanest way to turn a formation lead into a guaranteed point capture.
The pattern is simple. The moment your squad wins a frontline trade and the enemy is retreating, do not Rush down their remaining units. Hold on the tile you just won, let your melee re-anchor, and use Follow to walk the squad as a block toward the objective. The few seconds you spend re-anchoring are paid back twice over when the enemy tries a desperate counter-charge and runs into a fully formed line instead of a scattered chase.
Once you reach the objective tile, the closing sequence repeats the same bait-peel-anchor pattern from earlier, but on a smaller scale: Hold to deny the enemy a clean retake, Attack any unit that walks into your line, and Follow only if the enemy brings more than half their squad. Against a coordinated final push, a Hold on the point tile is almost always better than a chase, because the timer is your ally and every second you waste chasing is a second the enemy point ticks toward capture.
A solid command an army formation strategy is not about one perfect call. It is about stacking small, well-timed orders until the enemy runs out of map to give back. Master the four commands, respect the map timer, and your squad will do the rest.
Frequently Asked Questions
What is the fastest way to learn how to order troops in Command An Army?
Start every match on Follow and walk the squad to the first capture point without issuing any other command. Once you see the enemy frontline, switch to Hold one tile ahead of them, then Attack only when their melee is fully committed. This 3-command loop teaches the timing of every other formation tactic in the game.
Should I always use Rush to start a fight?
No. Rush is best used as a cleanup command once the enemy frontline is already broken, not as an opener. Opening with Rush sends your squad into a fully formed enemy line and burns your melee stamina before the first swing lands. Open with Follow or Hold, then Rush only when the enemy is retreating or low HP.
How do I kite without losing my melee line?
Hold your melee on a tile one step ahead of the enemy frontline, then Follow your player model on a 30–45 degree diagonal away from the enemy. The melee anchor protects the kite path, the diagonal angle prevents the enemy from cutting the corner, and the kite ends with a fresh Hold on a new tile.
What squad composition works best for a new commander?
A balanced line of 2 melee, 2 ranged, 1 cavalry, and 1 special is the easiest to position and the hardest to punish. It gives you a frontline to anchor, a backline to kite with, a flank tool to counter-push, and a special unit to clean up priority targets. Once you understand how each class wants to stand, you can start swapping pieces to fit the map.
Can I win fights with a low-star squad?
Yes, if you lean on command an army formation tips instead of raw stats. A 1-star squad with a clean kite angle and a well-timed Hold → Attack → Follow chain will beat a 3-star squad that spams Rush and chases kills. Star count decides the ceiling of a fight, formation timing decides whether you ever reach that ceiling.